Have seen navigation menu like this?
Please drop your mouse at the navigation below:
Interest to install this navigation menu in your blog? please read steps till finish.
Please drop your mouse at the navigation below:
Interest to install this navigation menu in your blog? please read steps till finish.
I need to affirm that scripts which I give is possibility cannot in applying perfectly
in your blog, because factor of the template which different each other, for that possibly you
require to a little a few script which I give.
This is his steps :
Right click at both this picture, then clicked save picture As... then keep in your computer.
Then upload both the picture to server ordinary place of you saving the pictures you have. example : I'm ordinary saving my pictures in google pages, and the picture have the address be like this :
Many ways to install this code, one of the way is be like this :
Step #1 :
Step #2
Besides the above ways, it is of course still many ways is again you can do, please try by your self.
Don't ever stop to doing an experiment !
This is his steps :
Right click at both this picture, then clicked save picture As... then keep in your computer.

|

|
| tableftJ.gif | tabrightJ.gif |
Then upload both the picture to server ordinary place of you saving the pictures you have. example : I'm ordinary saving my pictures in google pages, and the picture have the address be like this :
http://ahom24.googlepages.com/tableft10.gif


http://ahom24.googlepages.com/tabright10.gif
Be in fact, you can use both the picture address, but I worry if too much the user using this address, the server cannot handling it so that the navigation menu becoming not function better.
Many ways to install this code, one of the way is be like this :
Step #1 :
- Login to blogger with your ID
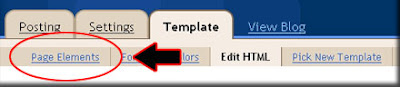
- After entering the dasboard page , click Layout. Please saw the picture :
- Then click edit HTML tab. Please saw the picture :
- I suggest to you, beforehand to back up your template. Click the Download full template link. Please saw the picture :
- After you click Download full template link, then will emerge new window just to download. Click the Save button. Saw the picture :
- You could choose this data would in kept where and with what file name what, Afterwards ended with click of the Save button. Please saw the picture :
- Copy and paste code above of ]]></b:skin>
- Go to underside, the code searching looking like be like :
- Change the code printing with green colour, so that his code become be like this :
- Click
 . Await a few moments do shall your template have in saving.


 <b:section class='header' id='header' maxwidgets='1' showaddelement='no'>

<b:widget id='Header1' locked='true' title='your blog title (Header)' type='Header'/>

</b:section>
 <b:section class='header' id='header' maxwidgets='2' showaddelement='yes'>

<b:widget id='Header1' locked='false' title='your blog title (Header)' type='Header'/>

</b:section>
Step #2
- Click at Page Element tab. See the picture below :
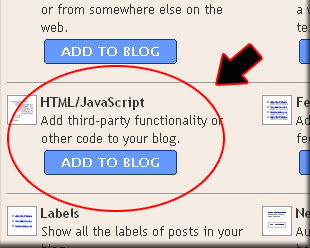
- Click at Add a Page element which located above of the header element. See the picture following :
- After emerging pop up window , Klik add to blog button for the things HTML/JavaScript. See the picture following :
- Copy and paste the code below into available column ( don't forget to change the links with link property of your own) :
- Click

- Finish. Please see the result.

Besides the above ways, it is of course still many ways is again you can do, please try by your self.
Don't ever stop to doing an experiment !


